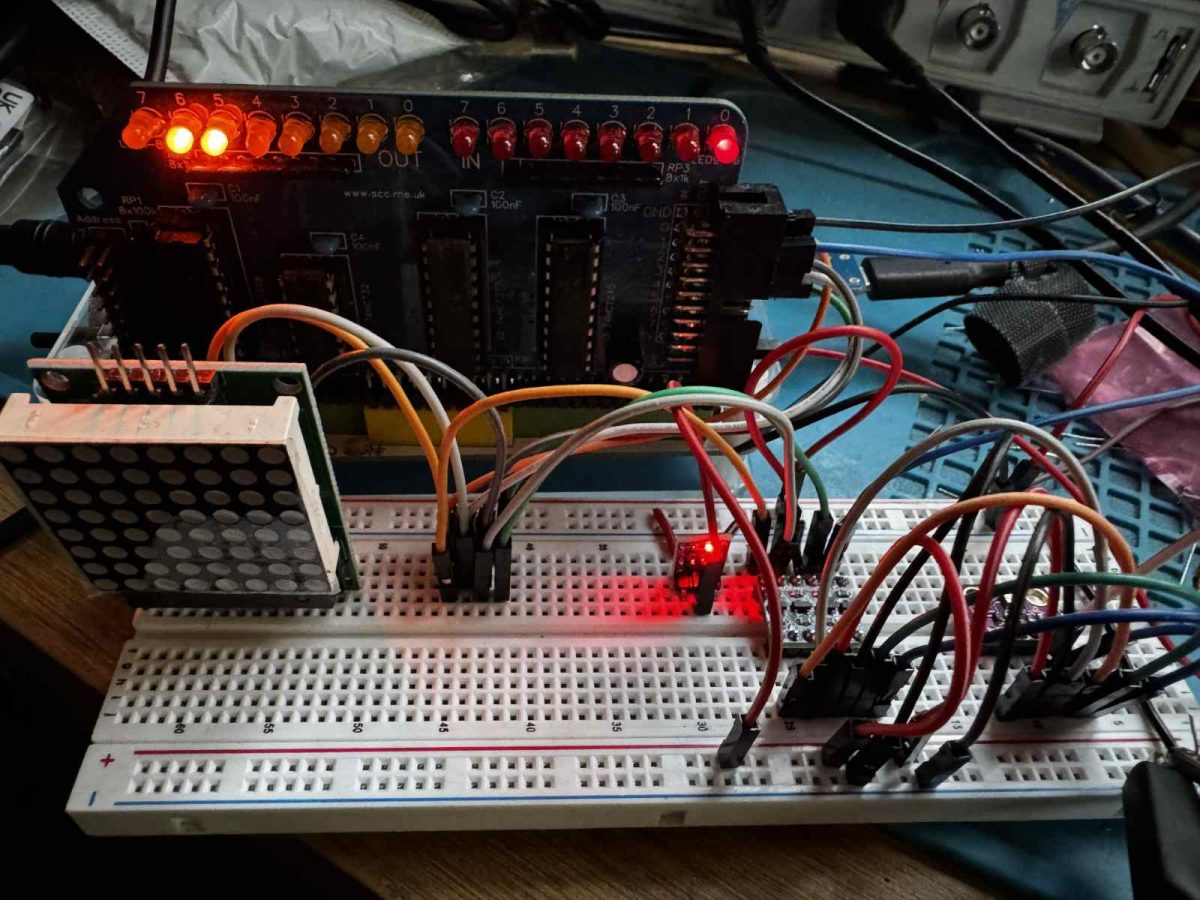
In previous posts, I’ve been able to read the temperature and humidity using a BME280 sensor attached to my RC2014 computer. The BME280 has one other reading it can provide, and that is atmospheric pressure.
As with the temperature and humidity, I need to calculate the value using the calibration data stored in the BME280. I also need the value of t_fine I stored when calculating the temperature. My previous post showed how to get these values. The BME280 datasheet gives me the algorithm and example code to calculate the air pressure.
The BME280 can also provide readings for humidity and atmospheric pressure. In this post, I’m going to look at reading humidity.
The BME280 provides the humidity value as a 24bit integer. I can use the read24 function I defined in my last post to read this value from the BME280. However, I can’t use it directly. Like the temperature reading, I have to do some calculations using the calibration data from the BME280. Thankfully, the BME280 datasheet gives me an algorithm to do this on page 25, so I just need to tweak this to drop in the relevant values.
That was really simple because most of the hard work had already been done in my previous post. The readHumidity function looks complex, but it’s just the example code from the datasheet tweaked to use my variables.
In my previous posts, I’ve shown how to read the ID value from a BME280 sensor using an RC2014 computer. That’s not very useful in itself, but it is a good building block for getting practical information from the sensor. In this post, I’m going to read the current temperature.
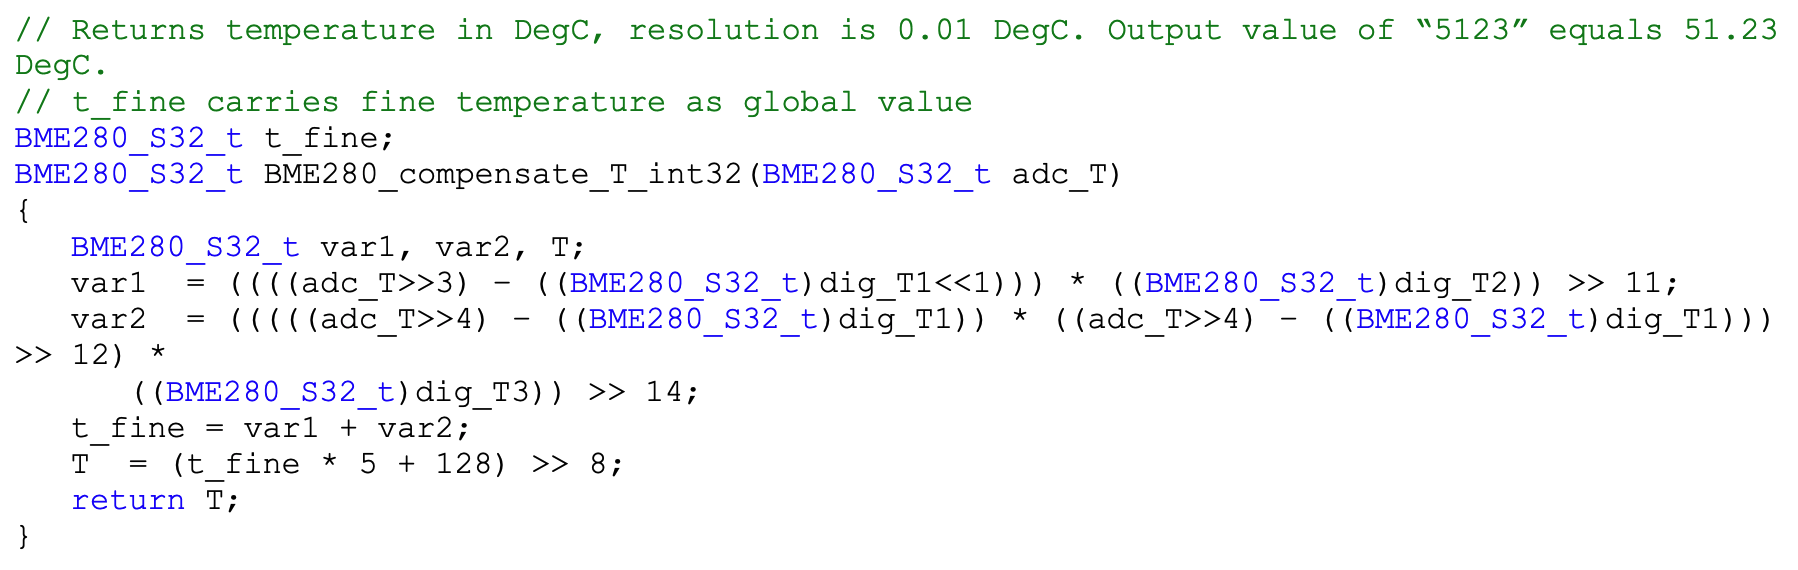
The temperature isn’t returned as a sensible, human-understandable value directly from the sensor. It needs to be calculated using calibration data that the BME280 also supplies. The BME280 datasheet gives us an algorithm to do this.
I also need to tell the BME280 to continually sense; otherwise, it is in sleep mode.
The BME280 is a very well-known sensor, and there are some libraries written for other systems that I can use to verify my work. Adafruit has a BME280 library for the Arduino that is written in C++. I am going to use some of the code from the Adafruit library where possible.
Writing and reading data
My previous post had a transfer routine to handle the bit-banging of SPI data, so I am going to build upon this.
The first routine we need is one to send and receive data of different lengths. I pass in address locations and lengths. The routine will then bit-bang that amount of data.
void write_then_read(const uint8_t *write_data, uint8_t write_length, uint8_t *read_data, uint8_t read_length) {
    // Deselect the BME280 to ensure it's not selected before starting communication.
    io_spi = SELECT | CLK | MOSI;

    // Write data
    for (uint8_t i = 0; i < write_length; i++) {
        transfer(write_data[i]);
    }

    // Read data
    for (uint8_t i = 0; i < read_length; i++) {
        read_data[i] = transfer(0x00); // Send dummy byte to read
    }

    // Deselect the BME280 after communication is done.
    io_spi = SELECT | CLK | MOSI;
}
I need to be able to read in 8 bit, 16 bit, and 24 bit values in little-endian format, both signed and unsigned, as well as to be able to write an 8 bit value. These utility routines can help with that.
The BME280 has numerous registers we can read and write to. The ID we retrieve in the previous blog post uses register 0xd0. Adafruit has defined all of these in their library, so I will reuse their code for this.
The BME280 doesn’t do much unless it’s told to. So we need a routine to turn it on and get it sampling data. There are various configurations defined in the BME280 documentation, but I’m going to lift these values from the Adafruit library, as they have done the hard work of turning them into enum values already.
To set the sampling rate, I need to perform several operations. I first put the BME280 to sleep. This allows me to safely update the configuration and control registers.
void setSampling(enum sensor_mode mode, enum sensor_filter filter, enum standby_duration duration) {
    // Set the sensor to sleep mode before changing settings
    write8(BME280_REGISTER_CONTROL, MODE_SLEEP);

    // Set the humidity oversampling to x1 (0b001)
    write8(BME280_REGISTER_CONTROLHUMID, 0b001);

    // Set the filter and standby duration in the config register
    uint8_t config = (duration << 5) | (filter << 2);
    write8(BME280_REGISTER_CONFIG, config);

    // Set the temperature and pressure oversampling to x1 (0b001)
    // and the mode
    uint8_t control = (0b001 << 5) | (0b001 << 2) | mode;
    write8(BME280_REGISTER_CONTROL, control);
}
Reading the calibration coefficients
I mentioned earlier the need to use calibration data to calculate the temperature. We need to get these values and store them.
typedef struct {
  uint16_t dig_T1; ///< temperature compensation value
  int16_t dig_T2;  ///< temperature compensation value
  int16_t dig_T3;  ///< temperature compensation value

  uint16_t dig_P1; ///< pressure compensation value
  int16_t dig_P2;  ///< pressure compensation value
  int16_t dig_P3;  ///< pressure compensation value
  int16_t dig_P4;  ///< pressure compensation value
  int16_t dig_P5;  ///< pressure compensation value
  int16_t dig_P6;  ///< pressure compensation value
  int16_t dig_P7;  ///< pressure compensation value
  int16_t dig_P8;  ///< pressure compensation value
  int16_t dig_P9;  ///< pressure compensation value

  uint8_t dig_H1; ///< humidity compensation value
  int16_t dig_H2; ///< humidity compensation value
  uint8_t dig_H3; ///< humidity compensation value
  int16_t dig_H4; ///< humidity compensation value
  int16_t dig_H5; ///< humidity compensation value
  int8_t dig_H6;  ///< humidity compensation value
} bme280_calib_data;

bme280_calib_data _bme280_calib;
The calibration data is a mix of signed and unsigned integers of various lengths. I can use the various read functions I defined earlier to read and save these.
The example code given in the BME280 datasheet returned the temperature as an integer, but for ease of use, I will want to use a floating-point value. This is simply the value from the datasheet divided by 100 to give us a value in Celsius. This routine makes extensive use of the calibration data from the BME280.
I have enough code to be able to read the temperature from the BME280, so it’s time to put it all together.
The first thing I need to do is reset the BME280. I can do this by writing to the soft reset register. Secondly, I turn on the BME280 and get it sampling. Next, I read the calibration data. Finally, in a loop, I can continually read the temperature and display it to my serial terminal.
int main(void) {
    write8(BME280_REGISTER_SOFTRESET, 0xB6);

    setSampling(MODE_NORMAL, FILTER_OFF, SAMPLING_X16);

    readCoefficients();

    while(1) {
      float temperature = readTemperature();
      printf("Temperature: %.2f°C\n", temperature);
    }
}
Compiling the code
Because I am using floating-point numbers, I need to include the maths library when compiling. I do this using the -lm flag.
The printf command doesn’t handle floating-point numbers by default, so I also need to enable this. This is done using a C pragma.
#pragma printf %f
When I compile the application using z88dk zcc, my command line looks like this.
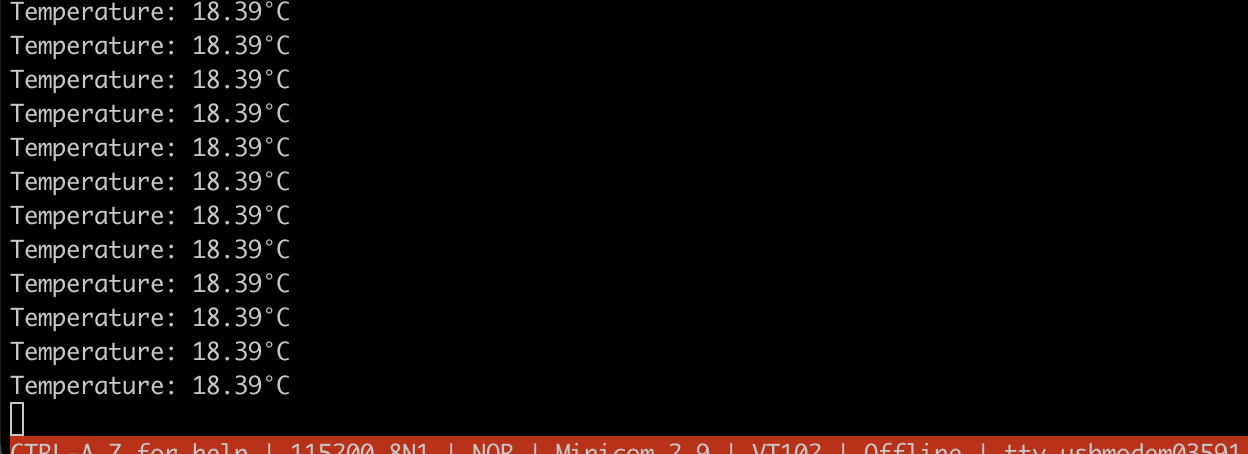
It was very satisfying to see real temperatures on screen when I ran the code. The thermostat in my room was set to 18C, so this seems to be working really well.
Cookie Consent
We use cookies to improve your experience on our site. By using our site, you consent to cookies.
Websites store cookies to enhance functionality and personalise your experience. You can manage your preferences, but blocking some cookies may impact site performance and services.
Essential cookies enable basic functions and are necessary for the proper function of the website.
Name
Description
Duration
Cookie Preferences
This cookie is used to store the user's cookie consent preferences.
30 days
Statistics cookies collect information anonymously. This information helps us understand how visitors use our website.
Google Analytics is a powerful tool that tracks and analyzes website traffic for informed marketing decisions.
Contains information related to marketing campaigns of the user. These are shared with Google AdWords / Google Ads when the Google Ads and Google Analytics accounts are linked together.
90 days
__utma
ID used to identify users and sessions
2 years after last activity
__utmt
Used to monitor number of Google Analytics server requests
10 minutes
__utmb
Used to distinguish new sessions and visits. This cookie is set when the GA.js javascript library is loaded and there is no existing __utmb cookie. The cookie is updated every time data is sent to the Google Analytics server.
30 minutes after last activity
__utmc
Used only with old Urchin versions of Google Analytics and not with GA.js. Was used to distinguish between new sessions and visits at the end of a session.
End of session (browser)
__utmz
Contains information about the traffic source or campaign that directed user to the website. The cookie is set when the GA.js javascript is loaded and updated when data is sent to the Google Anaytics server
6 months after last activity
__utmv
Contains custom information set by the web developer via the _setCustomVar method in Google Analytics. This cookie is updated every time new data is sent to the Google Analytics server.
2 years after last activity
__utmx
Used to determine whether a user is included in an A / B or Multivariate test.
18 months
_ga
ID used to identify users
2 years
_gali
Used by Google Analytics to determine which links on a page are being clicked
30 seconds
_ga_
ID used to identify users
2 years
_gid
ID used to identify users for 24 hours after last activity
24 hours
_gat
Used to monitor number of Google Analytics server requests when using Google Tag Manager
1 minute
Marketing cookies are used to follow visitors to websites. The intention is to show ads that are relevant and engaging to the individual user.
A video-sharing platform for users to upload, view, and share videos across various genres and topics.
Registers a unique ID on mobile devices to enable tracking based on geographical GPS location.
1 day
VISITOR_INFO1_LIVE
Tries to estimate the users' bandwidth on pages with integrated YouTube videos. Also used for marketing
179 days
PREF
This cookie stores your preferences and other information, in particular preferred language, how many search results you wish to be shown on your page, and whether or not you wish to have Google’s SafeSearch filter turned on.
10 years from set/ update
YSC
Registers a unique ID to keep statistics of what videos from YouTube the user has seen.
Session
DEVICE_INFO
Used to detect if the visitor has accepted the marketing category in the cookie banner. This cookie is necessary for GDPR-compliance of the website.
179 days
LOGIN_INFO
This cookie is used to play YouTube videos embedded on the website.
2 years
VISITOR_PRIVACY_METADATA
Youtube visitor privacy metadata cookie
180 days
You can find more information in our Cookie Policy and .