
This is a quick example on how to use a bicolour LED with a NodeMCU.
The bicolour LED has both red and green LEDs in a single package. There is a common cathode for both the red and green anodes. Applying a current to the red anode turns the red LED on. A current to green anode turns the green LED on. A current to both anodes creates yellow.
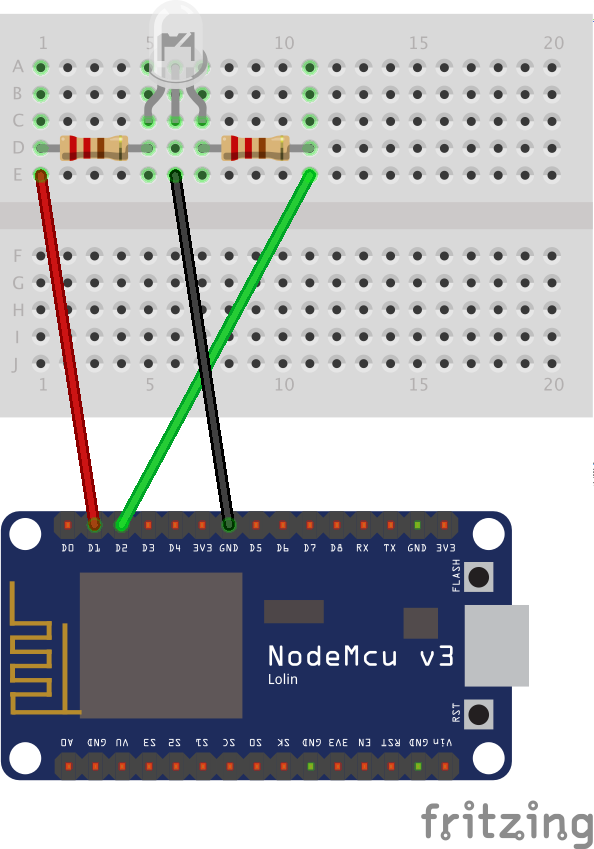
The circuit is very simple. We wire the red anode to D1 on the NodeMCU, the green anode to D2, protecting them both with a 220ohm resistor. The cathode is wired to ground.
We program the NodeMCU using an Arduino sketch.
int redPin = D1, greenPin = D2;

void setup() {
  // set the pins to output mode
  pinMode(redPin, OUTPUT);
  pinMode(greenPin, OUTPUT);
}

void loop() {
  // red
  digitalWrite(redPin, HIGH); delay(500);
  // yellow
  digitalWrite(greenPin, HIGH); delay(500);
  // green
  digitalWrite(redPin, LOW); delay(500);
  // off
  digitalWrite(greenPin, LOW); delay(500);
}
In the setup, we set D1 and D2 to both be outputs. We then turn D1 and D2 on and off in sequence every half a second to achieve a sequence of red, yellow, green, and off.
