It’s easy to add a temperature sensor to a Raspberry Pi. In this example I’ll explain how to set it up and access the data using PHP.
The DS18b20 is a great digital temperature sensor. It only needs three wires and a resistor to get it working on the Raspberry Pi.
The red wire is +3.3v, the black is ground, and yellow is data.
The resistor is connected between red and yellow to pull up the voltage on the data line.
Red is connected to pin 1 on the GPIO, black to pin 6, and yellow to pin 7.

Reading the temperature
Now the circuit is ready, we can access the data. We need to enable the relevant modules on the Raspberry Pi to do this.
modprobe w1-gpio
modprobe w1-therm
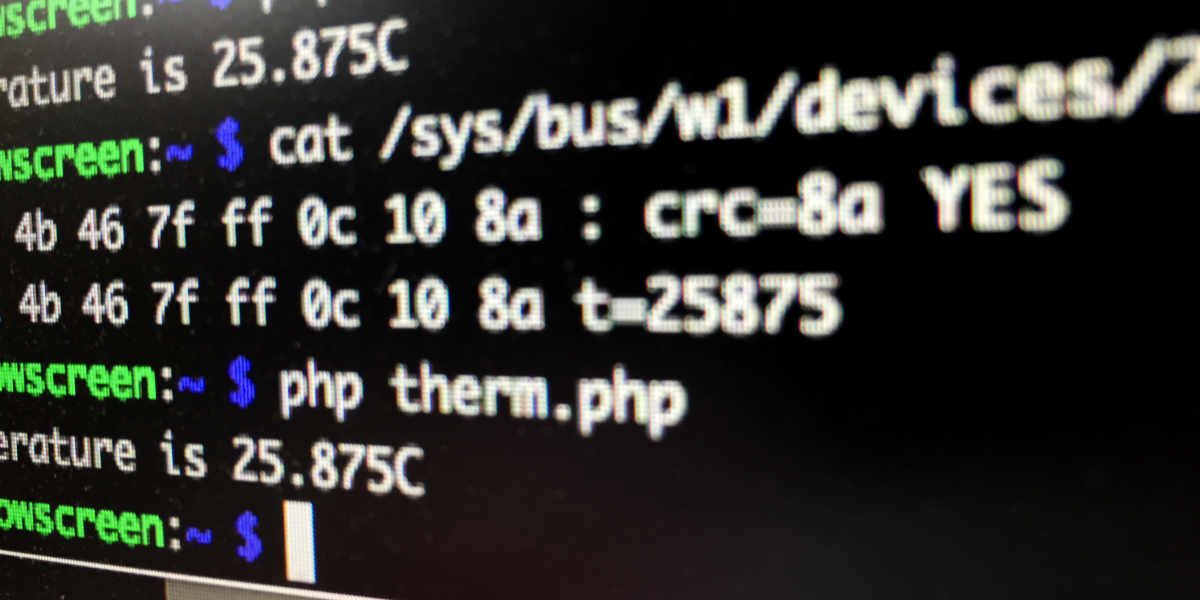
If we now look in the /sys/bus/w1/devices/ directory, we should see a directory starting with 28. This is where we can find the temperature data. Inside this directory is a file called w1_slave. This is the file we read get the data. When we read it, it actually asks the sensor for the data and return it. This means there is a slight delay before the data returns.
pi@Nowscreen:~ $ cat /sys/bus/w1/devices/28-031683a865ff/w1_slave
95 01 4b 46 7f ff 0c 10 65 : crc=65 YES
95 01 4b 46 7f ff 0c 10 65 t=25312
The temperature is the value t=25312. We divide this by 1000 to get the temperature of 25.312 degrees celcius.
Reading the temperature with PHP
The first thing we need to do is to find the directory where the w1_slave file is. We can use globbing to help here.
$base_dir = '/sys/bus/w1/devices/';
$device_folder = glob($base_dir . '28*')[0];
$device_file = $device_folder . '/w1_slave';
Now we need to read in the data. We can use the file method as this returns each line of the file in an array.
$data = file($device_file, FILE_IGNORE_NEW_LINES);
Now we extract the temperature. We check the first line is correct by checking for the value “YES” at the end of the line. If this is present we get the value for “t=” at the end of the second line. Finally we divide the value by 1000, and return it.
$temperature = null;
if (preg_match('/YES$/', $data[0])) {
    if (preg_match('/t=(\d+)$/', $data[1], $matches, PREG_OFFSET_CAPTURE)) {
        $temperature = $matches[1][0] / 1000;
    }
}
Now we can display the temperature.
if ($temperature) {
    echo "Temperature is ${temperature}C\n";
} else {
    echo "Unable to get temperature\n";
}
Final PHP temperature sensor code
Here’s the finished code. I’ve also included two system calls to modprobe to ensure the necessary modules are loaded before reading.
<?php

exec('modprobe w1-gpio');
exec('modprobe w1-therm');

$base_dir = '/sys/bus/w1/devices/';
$device_folder = glob($base_dir . '28*')[0];
$device_file = $device_folder . '/w1_slave';

$data = file($device_file, FILE_IGNORE_NEW_LINES);

$temperature = null;
if (preg_match('/YES$/', $data[0])) {
    if (preg_match('/t=(\d+)$/', $data[1], $matches, PREG_OFFSET_CAPTURE)) {
        $temperature = $matches[1][0] / 1000;
    }
}

if ($temperature) {
    echo "Temperature is ${temperature}C\n";
} else {
    echo "Unable to get temperature\n";
}